Tuesday, February 28, 2012

Cream of Potato and Broccoli Soup


So, I have two copies/versions of the Better Homes and Gardens Cookbook. One is an older version like my mom had and one is the updated version that the link points to.  My husband got me the updated version for Christmas two years ago.  That same year, my brother gifted me an immersion blender which I have mentioned in here once before.

The first thing that I made out of the cook book was cream of broccoli soup.  My husband and I thought that it came out really well.  It was yummy.

I had some potatoes to use up (in fact, I still have some to use up, but I have a lot less now), so I figured I'd make the potato version combined with the broccoli version.  I doubled the basic recipe and added to it.

Here is the basic recipe for the Cream of Vegetable of Your Choice Soup:

Desired Vegetables (variations listed include potato, cauliflower and broccoli)
1 1/2 cups chicken broth or vegetable stock
1 Tbsp butter or margerine
1 Tbsp all purpose flour
Seasoning
1/4 tsp salt
black pepper
1 cup milk, half and half, or light cream

Directions:
 In a large saucepan cook desired vegetables, covered, in a large amount of boiling water according to directions in each variation.  Drain well.  Reserve 1 cup cooked vegetables.

In a food processor bowl combine remaining cooked vegetables and 3/4 cup of broth.  Cover; process about 1 minute or until smooth.  Set aside.

In the same saucepan melt butter.  Stir in flour, seasoning, salt, and pepper.  Add milk all at once.  Cook and stir until slightly thickened and bubbly.  Cook and stir for one minute more.

Stir in the reserved 1 cup cooked vegetables, blended vegetable mixture, and remaining 3/4 cup broth.  Cook and stir until heated through.  If necessary, stir in additional milk to reach desired consistency.  If desired, season to taste with additional salt and pepper.

For the potato variant it says to use 5 medium potatoes peeled and cubed and a 1/2 cup chopped onion.  It also suggests dill or basil for the seasoning.

~*~*~*~*~*~*~*~ 

Now that you have the starting point, here's what I did.

 Ingredients:
3-4 cups chopped potatoes (I probably used 14 small red potatoes and peeled half)
4 carrots
4 ribs celery
1 large onion
4 cloves of garlic
4 cups chicken stock
2 cups milk
2-4 cups of broccoli (I didn't really measure)
salt, pepper and dill to taste
butter and flour (approx 2 Tbsp each)
bay leaf


Directions:

I chopped the whole onion, 2 carrots, 2 ribs of celery, and peeled the cloves of garlic.  I didn't bother chopping the garlic at this point, but I did smash them a little with the side of my knife.  I sauteed all of these vegetables with some pepper in the dutch oven with a little bit of olive oil until they had softened somewhat.


Before and while these were cooking, I peeled half of my potatoes and chopped them into small pieces.  Once the mirepoix (which is the fancy cooking term for the "aromatics" that are onions, celery and carrots) had softened, I added the peeled and chopped potatoes, the bay leaf and the 4 cups of chicken stock.  I let this cook for about 10 minutes, then I tossed in about half of the frozen broccoli I was going to use.


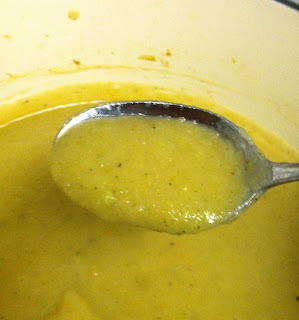
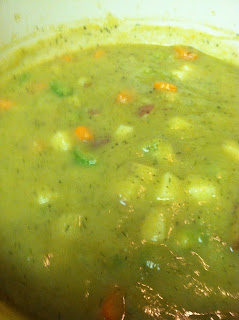
Once I made sure that the broccoli had softened and the potatoes were thoroughly cooked, I took the pot off the heat and blended everything with my immersion blender until it was smooth.  You can see the consistency in the second picture.


I returned the pot to the stove and added the seasoning and the remaining vegetables except the broccoli (2 chopped carrots, 2 ribs of celery, chopped, remaining potatoes, chopped with skin left on).  I let this mixture cook on a medium heat, stirring often, until the potatoes were cooked through and adding the broccoli with just enough time for it to heat through.


In a small saucepan, melt your butter, then add the same amount of flour to make your roux (another fancy cooking term which usually refers to a fat and flour used to thicken something).  Once the butter and flour are mixed thoroughly, let them cook for about a minute.  You want to cook off the raw flour taste.  

Next, add all of your milk to the roux.  I used 1 cup of whole milk and 1 cup of skim milk for mine.  Whisk your milk and roux together, eliminating lumps.  Heat until your milk starts to thicken, but not boil.  You don't want to burn the milk. 

Add the milk to the soup mixture and stir to combine.


We served ours with some grilled cheese sandwiches made with the wheat bread I posted previously and sprinkled with a little shredded cheese on top.

When I was making this, my husband asked me if there was any meat in the soup.  It's not really a soup that needs meat in my opinion, and the nice thing is that most of the thickness is from blended vegetables, so it's pretty healthy.

Try it and tell me what you think.

Thanks and happy eating!

Spring Vegetable Soup with Tarragon (and chicken)

So, you can find the recipe for this in Saturday's post.  I don't have any "as we go" pictures because I think I was being lazy.

I think for this soup, I spent more time chopping and cleaning things than I did paying attention to the soup itself.  I used the recipe as a guideline.  I figured that if I added more veggies to it, it wouldn't hurt.

I had never used leeks before this recipe, but I had seen other people talk about how dirty they were on the many food shows I watch in the background during the day.  They weren't lying.  I'm glad I saved them for last because my cutting board was dirty after I was done.

So, just in case you didn't feel like bouncing back and forth between the previous entry and this one, here is the list of veggies for the soup:

10 small red potatoes, quartered
2 medium carrots, sliced 1/4 inch thick
2 celery ribs, sliced 1/4 inch thick
1 medium onion, coarsely chopped
1 large leek, sliced 1/4 inch thick
1 pound green beans, cut into 1-inch lengths, or frozen peas

I think I used 8 red potatoes (because they were a little bigger than I thought), 4 carrots, 4 ribs of celery, and 2 leeks.   The green beans and onion were about right though.

After cutting everything up, I cleaned the leeks.  To do this, chop them however you need to for the recipe, fill a bowl with cold water and put all the copped leeks into the water.  Swish the leeks around to break the pieces apart, then let them sit for a few minutes.  The leeks float on the surface of the water while all the dirt sinks to the bottom.  I was amazed at exactly how much there was.

While the leeks were sitting in the water, I did my first addition.  I took a large, thawed chicken breast and seared it on both sides in a little garlic infused olive oil (making a nice brown flavor coating on the bottom of my dutch oven).  I removed the chicken breast, reduced the heat on the stove and sauteed the onion, carrots and celery until slightly softened.  I added the potatoes, salt, water, and leeks into the pot, then added the chicken breast back in.  I added the tarragon at this point.  The recipe sounds like it called for fresh tarragon, but I had dried stuff.  When you're cooking things in a slow cooker, or for longer periods of time, you want to add dried herbs at the beginning so they have time to develop.  If you're using fresh herbs, add them at the end.  If you cook the fresh herbs from the beginning, they won't be as potent and you'll lose some of the flavor.

I let all this cook at a simmer for about 30-40 minutes.  At that point, I pulled out the chicken breast and added the chopped, fresh green beans to let them cook while I shredded the chicken.  After 3-5 minutes, I added the shredded chicken back in, peppered to taste and added some more tarragon, and it was ready to serve.


My husband and I each had 2 bowls and we still had enough left over for 4 more servings.

I was amazed at how much flavor came out of the veggies and how dark the broth was.  The added chicken breast was just the right amount so that my husband didn't complain about there being no meat for dinner.  (I made another soup last night that had no meat in it and he just had to suffer.)

Anyway.  Try it .. you'll like it.

Thanks and happy eating!

Saturday, February 25, 2012

Linda's Herb and Spice World Tour Part 2: Tarragon

Here we have installment number two in Linda and Lilly's spice project.  While I'm not a big fan of licorice flavored things, I do really like tarragon.  When I go to Soup Plantation, I almost always get some of their tuna and tarragon pasta salad (and I'm not a big fan of fish either, but the tarragon makes it).  So, I was super excited when this packet showed up.  I made one of the recipes shortly after it arrived and loved it.  That will be the next entry.  This will just be the information and the recipes that were sent.

Tarragon


Tarragon, or Artemisia dracunculus, is a perennial herb in the lettuce family and is related to wormwood. Native to northern Europe, Siberia, Russia, and parts of Asia, tarragon went from relative obscurity in the cooking world to the forefront of French cuisine in just a few hundred years – a remarkable accomplishment considering its competition.

Characteristics

Tarragon is a small, attractive herb with slim vertical stems and long, narrow dark leaves which are green in color. The herb is native almost exclusively to the Northern hemisphere, and has spread from its cultivation in Europe and Scandinavia to parts of North America as well. The plant prefers dry, poor soil which typically is unfriendly to delicate herbs – excess moisture in the soil can actually lead to frostbite and death in colder climates, so dry soil protects the plant.

There are two varieties worth mentioning in reference to the kitchen – French tarragon and Russian (or Siberian) tarragon. The French is held in higher esteem because of its milder flavors and glossy appearance (the herb has smooth, deep green leaves). Russian tarragon is a suitable substitute in most cases, but is said to have an “inferior” flavor by comparison; this variety can be identified by its rough leaves and light green color.

Tarragon is similar in flavor to anise, with sweet and heady notes and a fragrant aroma.

Common Uses

The herb is, compared to kitchen plants which have been used for thousands of years, relatively new to many world cuisines. It has found a semi-reliable place in Mediterranean, European, and North American cookery. However, tarragon is most commonly associated with French cuisine due to its placement in an herb blend referred to as the “fine herbes” (fresh parsley, chives, chervil, and tarragon); it is also used in well known sauces such as Bearnaise and in dishes like tartare. Tarragon pairs well, when used correctly, with fish, lobster, red meats, chicken, some roasted vegetables, fresh salads, and tomatoes; dressing, marinades, soups, and vinegars can also be enhanced with a bit of tarragon. It also goes nicely with eggs – the traditional French herb omelet demonstrates this nicely.

Tarragon contains a numbing compound, eugenol, which makes it a good natural remedy for minor pain-related symptoms such as toothache or sore gums (the Greeks used the herb this way). It was also classified for a time under an archaic school of medicine which claimed that certain herbs could cure ailments inflicted by animals or offenders similar to the plant; tarragon, with it’s long, narrow leaves, was assumed to treat snake bites and wounds from venomous animals because it looked like fangs…there isn’t much information on how successful the treatment was, perhaps because the practitioners of this school of medicine didn’t live very long…

Use and Storage

Tarragon loses its flavor with unfortunate speed when dried – preserving in herb in vinegar is a good option for those wanting to use its essence for cooking when the leaves are unavailable. Tarragon can be stored for a short time in the fridge, but is sensitive to cold and can deteriorate quickly. Dried tarragon is less potent but can be purchased in many fine grocery stores and supermarkets.

It is best to use tarragon with a light hand – the herb can easily overpower all other elements in a dish.

Use It (How to/where)

• along with chives, parsley, and chervil to season French dishes
• in egg dishes and delicate omelets
• infused into vinegar to season many dishes
• in salad dressings and marinades
• to season fish, lobster, and seafood
• paired with chicken and young fowl
• with red meats and some roasts
• in soups and stews
• in sauces like BĂ©arnaise

Recipes

Spring Vegetable Soup with Tarragon (Serves 4)
Food & Wine 

7 cups water
10 small red potatoes, quartered
2 medium carrots, sliced 1/4 inch thick
2 celery ribs, sliced 1/4 inch thick
1 medium onion, coarsely chopped
1 large leek, sliced 1/4 inch thick
1/2 tablespoon kosher salt
1 pound green beans, cut into 1-inch lengths, or frozen peas
2 tablespoons chopped parsley
1 tablespoon chopped tarragon
Freshly ground pepper 

Directions:

In a large pot, combine the water with the red potatoes, carrots, celery, onion and leek. Bring to a boil. Add the salt and simmer over moderately low heat for 30 minutes.

Add the green beans and simmer until tender, 3 minutes. Stir in the parsley and tarragon. Season with pepper and serve.

Notes One Serving 163 cal, 0.5 gm fat, 0 gm sat fat, 36 gm carb, 6.8 gm fiber. 

Tarragon Omeletta
The Perfect Pantry 

10 large eggs, well beaten
3/4 cup shredded cheese (gruyere, cheddar, fontina, or your favorite mix)
3 Tbsp minced fresh herbs (tarragon, parsley, thyme, basil, or a mix) OR 4 tsp dried herbs
Large pinch of sea salt
Large pinch of fresh ground black pepper
2 Tbsp olive oil

Directions:

In a large bowl, combine eggs, cheese, herbs, salt and pepper, and beat lightly with a whisk to combine. Heat a large frying pan over lowest heat; add the oil, then pour in the egg mixture. Cover, and cook for 5 minutes. Lift the lid, and with a spatula lift the edges of the omeletta and let some of the uncooked egg from the top run underneath. Replace the lid and continue cooking over low heat for another 3 minutes. Again, lift the edges and let the uncooked egg on top run underneath. Cover, and continue cooking until the egg is set, another 5 minutes or more. If you prefer to have the top browned, either flip the omeletta and cook for 1 minute, or place under the broiler until the top is lightly browned. Serve hot or at room temperature.

~*~*~*~*~*~*~*~

I made the soup with minor additions.  It was delicious and I will be sharing that next.  I need to see if I can find the picture of the finished product.  I encourage everyone to try tarragon.  It's a great herb.  The smell of it makes me happy.

So, get some tarragon, try one (or both) of these recipes and tell us what you think!
Thanks, and happy eating!

Friday, February 24, 2012

Cardamom Vanilla Pound Cake

Finally the finished product that I've been promising to post.  The Cardamom Vanilla Pound Cake that came along with part one of the spice project my friends Linda and Lilly are doing this year.  I have part two waiting to be posted, but I didn't want to do that until I got these pictures up.

So, back on January 6th, I posted the information and recipes for Cardamom in this journal.  I chose to make the pound cake recipe on that page.  It was delicious.  I think my husband said it was the best cake he's ever had, and he told me that we're never buying store bought whipped cream again.

You can go to the link above to find the recipe, so this blog is going to be mostly pictures and my own rambling about how it went.  There were a few things in this recipe that I had never done before.  I didn't even own a bundt pan, so I had to buy one of those, but I took advantage of my Amazon Prime free trial to order one with free 2 day shipping to get one.  I had also never used real vanilla beans before.

I started as the recipe directions stated.  I prepped the pan (even though the reviews of the pan I got said that you really didn't need to use anything on it), then mixed my dry ingredients together.


Then, in my mixer, I creamed the butter and sugar until it looked like this


Next was the vanilla bean scraping.  I cut the beans in half the long way and used the tip of my knife to scrape the pods.  I was surprised by two things.  The beans themselves were more waxy feeling than I thought they'd be, and there were more seeds in them than I thought there would be.  I wasn't complaining though.


I still have the shells.  They are sitting in a container with white sugar to make vanilla sugar.  I use it in other dessert type things.

I continued to follow the directions.  A friend of mine gave me some lemons for the lemon juice.  Before I cut and juiced the lemon, I zested it to sprinkle on top of the whipped cream.  You'll see that later.

Once everything was mixed together (eggs, lemon juice, flour mixture and milk), it should look like this (you can see all the little dots of the vanilla bean seeds in there):


Then it gets spooned into the bundt pan carefully.  You don't want to undo all the butter and flour prep that you did in the beginning.  I got it all in there (and I was very proud of myself for not getting too much on the sides), tapped it on the counter like the directions stated and smoothed the top with my spatula.


I let it bake as directed.  It took about an hour like the recipe suggested.  It looked pretty even still in the pan


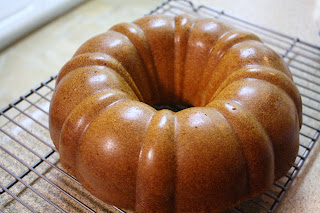
Next came the scary part.  Bundt pans are notorious for not releasing completely and you end up with chunks missing out of your pretty cake top.  After what had been about an hour cooling in the pan, I decided to give it a shot.  I put my cooling rack on top, flipped it over, and tapped on the pan a few times.  I closed my eyes and pulled the pan up.  When I opened my eyes I was amazed.  It came out beautifully.


My husband came home, looked at it and asked if it was a real cake.  It came out so well that it was shiny (as you can see).

Some time during the baking/cooling process, I made the whipped cream.  It was a pretty simple process.  You added everything together in the mixer:


And mixed it until it was fluffy and held it's shape.  I probably could have beat it for a little while longer, but if you mix it too long, it starts to turn to butter (which I did at a later date on purpose).


And the final served product:


Try it, it's good ... mmm.

Thanks and happy, yummy eating.

Thursday, February 23, 2012

Mmmm... Bread Part 2 ...

So, I make bread frequently because it's cheaper than buying bread.  It's not really all that difficult now that I've found a recipe that gives me a softer crust.  Crusty bread is good for some things (like dipping in olive oil and balsamic vinegar ... yum), but for an every day bread that I use for sandwiches and stuff, I like something that doesn't feel like I'm tearing up my mouth if I bite into it.

One of the first posts that I did was of my favorite bread recipe, and you can find that here. The only "problem" with this bread is that it's made with white flour.  I put problem in quotes because it's not really a problem.  I'm sure it's healthier than white bread you can get at stores, but it could also be healthier.

A while back, I tried to make some homemade granola and it came out okay, but it wasn't exactly the texture that I was looking for.  I wanted some granola that clumped together.  To try to accomplish that, I had purchased some wheat germ.

My hope was that the smaller particles would kind of act like a cement when the liquid/sugar flavors were added and create the clumps I was hoping for.  It didn't, but this blog entry isn't about granola.  This part is just back up to explain why I had some wheat germ just hanging around with my baking stuff.

According to some information I researched, I could substitute up to 1/3 of my flour in yeast breads with wheat germ.  So, that's what I did in my bread recipe.  I was looking for something to make my bread a little more nutritious.

I followed the same process as in the main recipe and used 1.5 cups of wheat germ and 3.5 cups of flour.  In the bread recipe, the ratios of wet to dry liquids work out perfectly every time, but with the substitution, the dough was very wet and sticky.  I added more flour, a little at a time, until the dough started to pull together.  I think it was 3/4-1 cup of additional flour.  The dough was still a little softer and stickier than I was used to, but it was just dry enough that it wasn't sticking to everything anymore and I didn't want to over work the dough or make it too dry.

I continued to follow the same process outlined in the main recipe and let the dough rise.  I punched it down, split it in two, rolled the loaves and let them rise again.  I baked them at 400 degrees for about 20 minutes (rotating the pans once on the shelf for even browning about 10 minutes in), then took them out to cool.


Once they were mostly cooled, I sliced them in to small, sandwich sized slices and tried a piece.  It turned out pretty good.  To be honest, I wasn't sure how it would taste because I love the taste of the other bread, but I think this one might be even better (though I haven't tried it with a little peanut butter and a little Nutella yet... one of my favorite dessert sandwiches).  It even got a "pretty good" out of my husband, who has never really been a fan of the wheat breads I've bought in the past.  He said that he thought it came out softer than the other version.


I'm getting pretty good at slicing even slices in bread.  I used to be horrible at it.  I guess practice really does help.  A good knife doesn't hurt either.

This is the first time I've really done a substitution in a baking recipe.  I've always been a little afraid to do that because baking can be pretty fickle, and it can turn disastrous if you get the ratios wrong (though breads tend to be a little more forgiving I think).

Anyway.  Give it a try if you want and let me know what you think.

Thanks and happy eating (happy and healthier)!

Wednesday, February 22, 2012

Lasagna "Cupcakes"

I was wandering around the internet one day.  I don't even remember what I was looking for.  But I came across Lasagna Cupcakes and I immediately shared the link on my Facebook page so that I didn't lose it.  I knew I wanted to make them.

I would like to try them again with a few adjustments.  But for the first time, I made them pretty much according to the recipe (though I can never really stick to a recipe unless it's baked goods).

Ingredients

  • 1 cup marinara sauce
  • 3/4 pound ground beef
  • 12 wonton wrappers
  • 8 ounces shredded mozzarella
  • 3 ounces Parmesan cheese
  • 4 ounces Ricotta cheese
  • (optional) basil for garnish

Directions

  1. Preheat oven to 375 degrees. Spray muffin tin with cooking spray.
  2. Brown beef and season with salt and pepper. Drain.
  3. Cut wonton wrappers into circle shapes using a biscuit cutter or using the top of a drinking glass. You can cut several at a time.
  4. Reserve 6 tablespoons Parmesan cheese and 6 tablespoon mozzarella for the top of you cupcakes. Start layering your lasagna cupcakes. Begin with a wonton wrapper and press it into the bottom of each muffin tin. Sprinkle a little Parmesan cheese, Ricotta cheese, and mozzarella cheese. Top with a little meat and marinara sauce. Use around 1-2 teaspoons of all the ingredients depending on your personal preference.
  5. Repeat layers ending with marinara sauce. Top with reserved Parmesan and mozzarella cheese.
  6. Bake for 18-20 minutes or until edges are brown. Remove from oven and let cool for 5 minutes. To remove use a knife to loosen the edges then pop each lasagna out.
  7. Garnish with basil and serve.
 I followed this for the most part.  I decided I was going to make my own fire roasted tomato sauce for this though.  I had some shallots to use up and I always have garlic in the house.  so I diced those up and sauteed them until they got soft.  I added some pepper and some Italian herbs, then added the tomatoes.  I used canned tomato products that I had on hand as well.  I believe I used 1 can fire roasted tomatoes and one can tomato sauce.  I let it all cook together, low and slow for a while.  I probably cooked it for two hours or so.  Once i felt like the flavors had enough time together, I pulled out my immersion blender (I love my kitchen toys) and blended it all together.

Here's how the sauce came out:


Looks like tomato sauce.  It tasted pretty good too.  I remember thinking I could probably just eat that and be happy.

I also used a zesty Italian sausage instead of ground beef and an Italian 5 cheese blend instead of Mozzarella and Parmesan.  The recipe makes 6, but I made 12 regular cupcake sized mini lasagna.

I layered everything in and here's the before baking picture:

 I baked them until they smelled done and the edges were crispy.  (As you can see, I also didn't follow the "Cut wontons into circles" instructions.... have you noticed that I'm bad at following directions?)

And the finished product:


They were yummy.  I actually took leftovers to work with me and used the dreaded microwave there to eat the rest (for those that know me, know this was a huge step ... I have what I like to call food paranoia... that mostly centers around other people and a lack of trust there).

The next time I make them, I would like to make my own pasta sheets (another of my kitchen toys... a pasta roller attachment for my KitchenAid Mixer).  That's really the only thing that I would really change (other than my improvised changes that I used this time).

Try them... you'll like them.

Thanks (and I need to do more of these... work schedule has been random lately and I haven't had much time to sit at the computer... I still need to put cake pictures on the computer so I can do that entry... and I have another installment of Linda's Herb and Spice World Tour with an herb that I like quite a bit) ... and happy eating!