Showing posts with label favorite. Show all posts

Sunday, August 18, 2013

Pretzel Buns (and rolls and knots)

So, as promised in yesterday's update, here is the pretzel bun recipe that I made.  And I made it twice more today.  I will apologize in advance if this seems a little rambly, but it's late and it's been a long day and I still have dishes and a few other things to do before I can go to bed.  I may go back and edit this at a later date.


The recipe came in my King Arthur Flour Catalog, and since hubby likes pretzels in just about any form, I thought I'd give them a try.  I've made pretzels before.  I've attempted hard pretzels only once.  The taste was good, but they didn't look pretty.  They looked like something I'd pull out of my cat's litter box.  I had better luck with soft pretzels, but the other recipe I had used was a little more complicated.

So here is the recipe.  (Both through the link and written out here.)


Dough

  • 1 3/4 cups warm water
  • 2 tablespoons unsalted butter
  • 3/4 teaspoon salt
  • 4 1/2 cups All-Purpose Flour
  • 1/4 cup nonfat dry milk
  • 2 teaspoons instant yeast

Topping

  • coarse sea salt

Water Bath

  • 2 quarts water
  • 1 tablespoon salt
  • 1/4 cup baking soda


Directions

1) Mix and knead the dough ingredients — by hand, mixer, or bread machine — to make a smooth, slightly sticky dough.
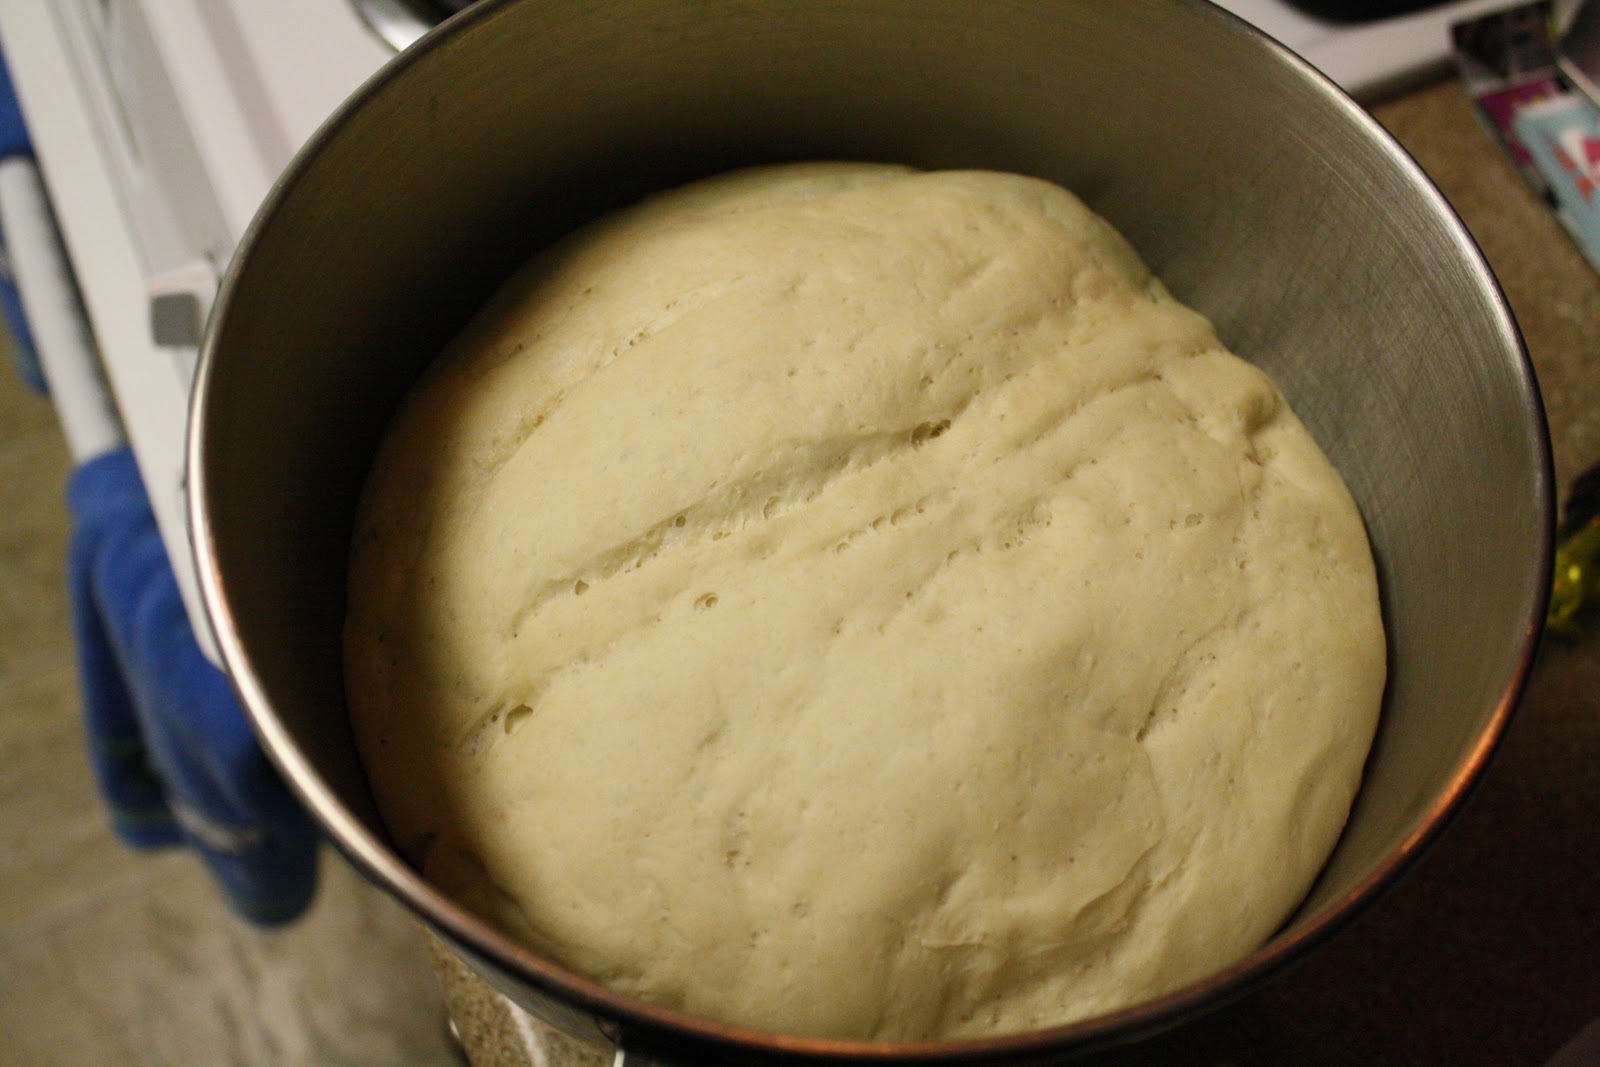
2) Allow the dough to rise in a lightly greased bowl, covered, for about 1 hour, until doubled.
3) Gently deflate the dough, and transfer it to a lightly greased work surface.
4) Divide the dough into 10 pieces and shape each piece into a smooth ball.
5) Place the balls on a lightly greased baking sheet, cover, and let rest for 15 minutes.
6) Preheat the oven to 400°F.
7) Prepare the water bath: Bring the water, salt, and baking soda to a boil in a large pot.
8) Drop 5 dough balls at a time into the water bath.
9) Cook for 30 seconds, flip over, and cook for 30 seconds longer. Using a slotted spoon, return the buns to the baking sheet.
10) Using scissors or a sharp knife, cut 1/2"-deep crosses into the center of each bun. Sprinkle with coarse sea salt.
11) Bake the buns for 20 to 24 minutes, or until they're a deep-dark brown. Remove them from the oven, and transfer to a rack to cool.
Yield: 10 buns

So, that's the info on the recipe right from the website.

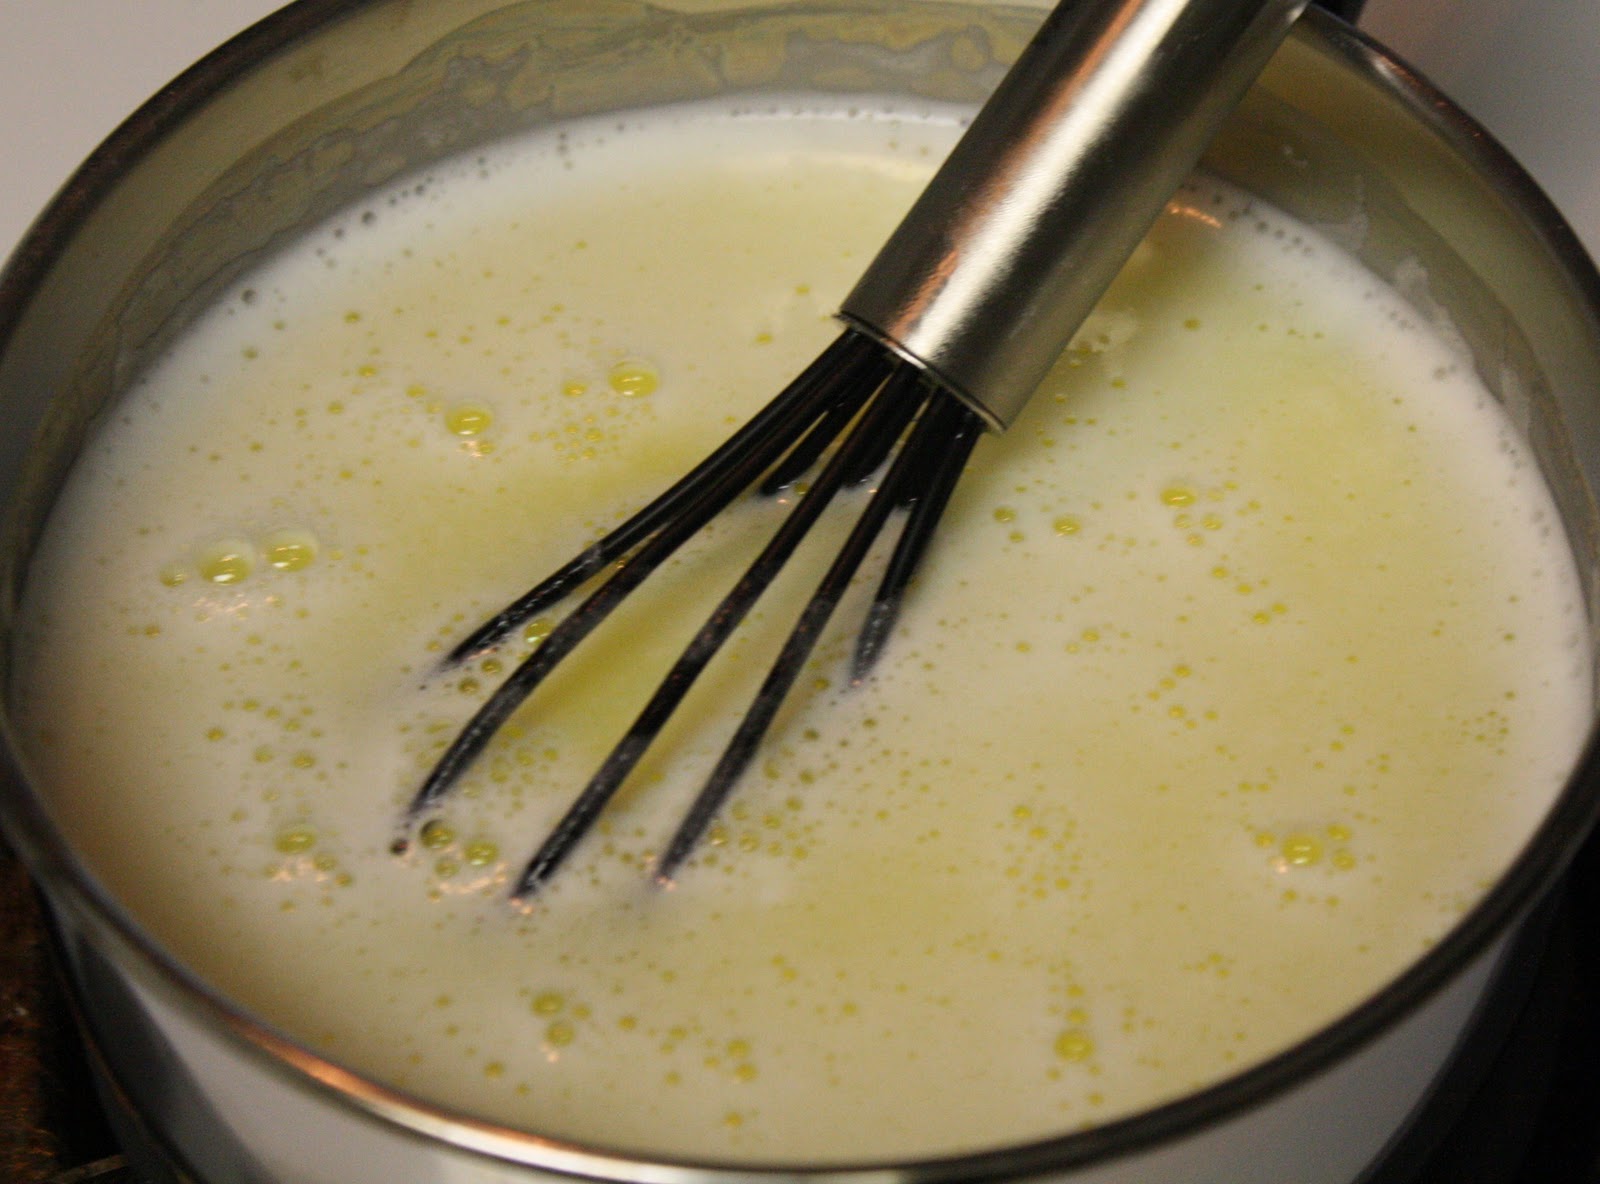
I put all the dry ingredients in my mixer and blended them.  I had melted the butter into the warm water so I didn't have to worry about it not incorporating it thoroughly.  Yesterday's batch mixed up perfectly as the recipe is written.  Both batches today needed a little more flour.  I can only assume it was due to an environment change (temp/humidity/etc).  After working with bread doughs, you get to know what to look for and when you need to make some adjustments.

And because I'm not big on potentially splashing boiling hot water on me (I've done it before and it hurt for quite some time), I used a spider spoon/strainer (like this) to lower the dough balls into the water bath one at a time.  I did not put them in 5 at a time because my 8qt pot was too small to work with them easily.  As soon as you put them on the baking sheet, sprinkle the salt on while they're still wet or else the salt will just fall off.

If you use two baking sheets, you must rotate them mid bake so that they brown evenly.

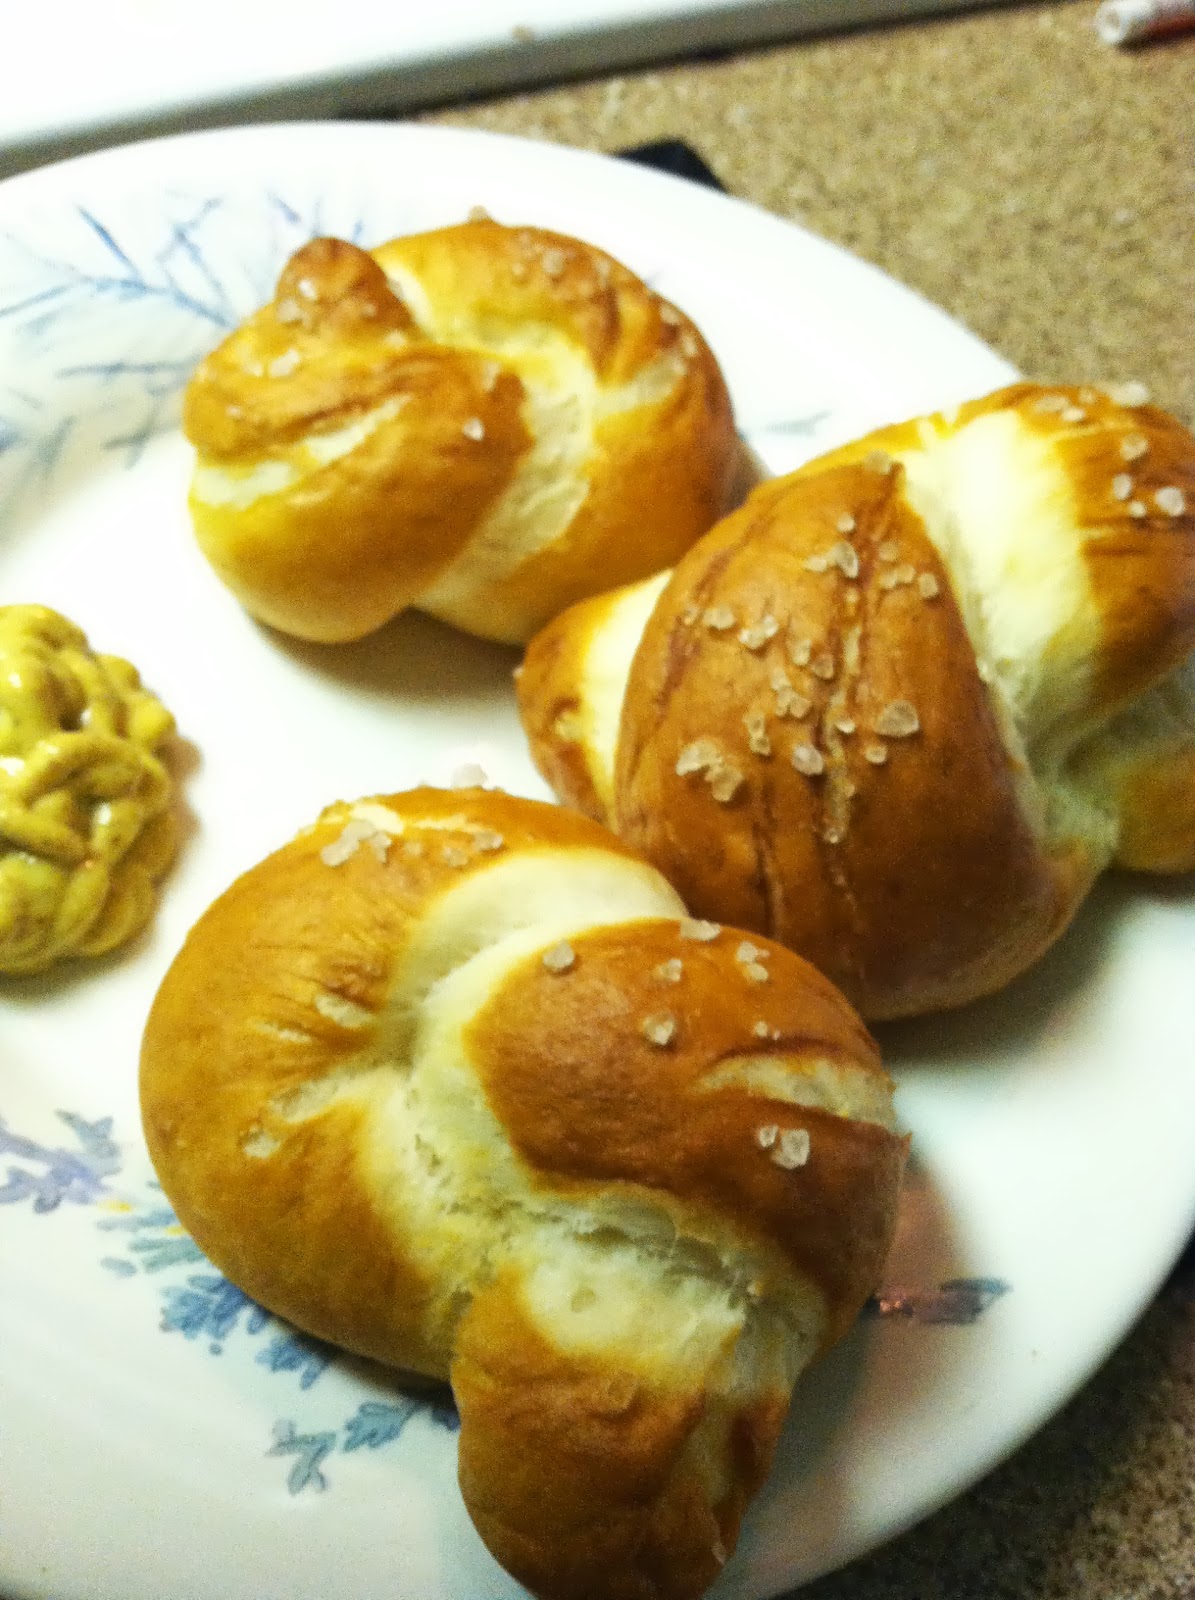
The three batches I made over the weekend made 10 buns, 12 hot dog rolls and 24 pretzel knots.  Pictures to follow.  The baking time seemed about the same for all the shapes.

We did burgers for dinner last night with home made french fries and pickled red onions (that I pickled a few weeks ago).


I'm still getting the hang of shaping hot dog buns.  Its why I usually make them lobster roll style.


The knots turned out to be my favorite thing.  They weren't difficult and they look great/fancy...


Until next time...

Happy Eating!

Saturday, July 21, 2012

Bread, Bread and More Bread

Again, it's been a while since I've posted.  About a week after I posted the update about the pregnancy, hubby and I found out the baby stopped growing.  We've processed it and we're good.  It's a sad thing, but it's also very common.  And so we're going to try again.

Getting back into a pattern after all the chaos that came with that was a little difficult.  I haven't done much creatively in regards to cooking.  I have baked though.  I tweaked the potato roll recipe from the previous recipe a little bit.  I added a 1/2 cup of milk to the heated potato mixture.  That helped to provide enough room to stir the potatoes constantly while cooking (to avoid the burning milk problem I had with the first batch).  So basically the cooking liquid is 1 1/2 cups of milk and 1/2 cup water.  The only problem I had with this was that it was harder for me to mash the potatoes at the end.  That wasn't really a problem for me though.  I just used my handy immersion blender to blend it all together.


Following the rest of the recipe posted in the previous post, I made the hot dog rolls and a batch of burger buns.  (I usually make the burger buns with wheat bran, but I was out).

The same day that I did these two batches, I also made some oatmeal bread.


This was the whole day's haul.  I really like the oatmeal bread.  That may be my new "go to" everyday bread.

I got the recipe from King Arthur Flour.  I didn't make any changes to the recipe ingredients, but I did change a little of the process.  Instead of using lukewarm milk, I heated the milk to almost boiling (with the salt, sugar and butter) and let it cool to lukewarm.  When it cooled to about 130 degrees F, I poured it over the oats and let them soak for the remainder of the cool down.  The first time I tried the recipe, I let them soak for the entire cool down period, but the oats got too soft and the bread was super soft.


I have ordered live sourdough starter from King Arthur Flour as well as stuff to make Rye Bread.

Sourdough bread has been my bread nemesis.  I have tried to make my own starter and failed.  I have requested dried starter that came with instructions on how to bring it back to life.  I failed with that too.  So I broke down and ordered live starter.  I received it and followed the instructions for feeding it.  I have since given away two sets of started to friends and have a thriving starter to use whenever I want to.

I tried making sourdough last weekend.  Sourdough is still my nemesis.  I didn't exactly fail.  The bread was good, but it wasn't what I was looking for.  It wasn't sour enough.  It was a quick rise with extra yeast.  Next weekend I will be trying a different recipe for sourdough that calls for 30 hours of feed and rise time before baking with no extra yeast added.  If that is successful, I will share that whole process.

The rye bread was also not successful, but I'm not sure if that was the recipe or my fault.  The day I made it was the same day I made the sourdough.  I also made strawberry margarita jam and dill pickles.  The reason the rye wasn't successful may have been because I forgot to put the salt in.  We're going to try it again as written and make sure that I skipped the salt.


The round loaf is the sourdough and the rye is upside down because the top wasn't pretty.  Hubby is still eating the rye though.  So, other than being bland, I guess it's not too bad.

I'll try to do another update soon.  I have quite a few more pictures already uploaded just waiting for me to do an entry.

Until then... Thanks and Happy Eating

Saturday, April 28, 2012

Buttermilk Pancakes

So, I have found a new Buttermilk Pancake recipe that I really do like.  They're probably my favorite pancakes ever.  I originally made them because I had some leftover buttermilk from making some green velvet cupcakes.  I only needed a cup of buttermilk for the cupcakes, but the smallest container I could find was a quart of buttermilk.

Anyway.  This recipe was perfect.  I don't quite remember where I found it, but if I figure that out, I'll edit this.

 I'm going to share the recipe first, then share some thoughts.  I have made these a total of three times to date.

Buttermilk Pancakes 

3 cups all-purpose flour
3 tablespoons white sugar
3 teaspoons baking powder
1 1/2 teaspoons baking soda
3/4 teaspoon salt
3 cups buttermilk
1/2 cup milk
3 eggs
1/3 cup butter, melted

Directions:

1. in a large bowl, combine dry ingredients.  In a separate bowl (or in my case a 4 cup measuring cup) beat together the wet ingredients.  Keep these separate until ready to cook.


2. heat a lightly oiled griddle or frying pan over medium high heat.  You can test this by flicking water across the surface.  If it beads up and sizzles, then it's good to go.

3. Pour the wet mixture into the dry mixture, using a wooden spoon or a fork to blend.  Stir until just blended together.  Do not over stir.  (It's okay if it's lumpy)


4. Pour or scoop the batter onto the griddle (approximately 1/2 cup per pancake).  Let cook until bubbles pop and don't refill and the edges start to cook.


5. Flip and brown side two.  I usually have my oven heated to about 200 degrees F with a cookie sheet on it to keep the finished pancakes warm until all the rest of breakfast is done.


Now, as I said earlier, I have made these three times.  The first two times were with liquid buttermilk and they turned out great.  The recipe states that the recipe requires fresh buttermilk, but I thought I'd try it with some other stuff I keep on hand.


And, yes... I took that picture while the container was inside my refrigerator.

 Basically this is a powdered buttermilk.  It works great for buttermilk biscuits and probably any other oven baked breads.  It worked okay in these pancakes.  You use 4 tablespoons of this to a cup of water to make a cup of buttermilk.  If you look at the picture of the dry ingredients, the yellower powder is this buttermilk powder.  The wet ingredients had three cups of water instead of the butter milk that the recipe asked for.  

I guess the problem with using this was that the batter wasn't as thick as it was when I used fresh buttermilk.  It affected the consistency of the pancakes.  They weren't bad by any means.  They just weren't as light and fluffy.  I ended up adding more flour to the mixture to make it thicker.  Once the additional flour was in there, they worked great.  

I think next time I try them, I'll add another 1/2 cup of flour at the beginning and see how it works.  If it's still not right, I'll probably just stick to using the powdered stuff in baked goods and get a quart of buttermilk when I want to make these pancakes.

And as a side note, these are great as a dessert too.  Just pop the leftover pancake in the toaster and spread some nutella on it.  My husband says that they're dangerous that way.

Monday, April 16, 2012

"Sweet Potato Shepherds Pie"

The title of this is in quotes because there will be some purists who may find this and state that Shepherds Pie is only made with lamb and mashed potatoes, and if it's made with ground beef, it's Cottage Pie.  I like calling this Shepherds Pie because most people I know are familiar with the dish, and may not be familiar with Cottage Pie.

Anyway.

A few weeks ago, my husband found a recipe in a newspaper at work.  He took pictures and texted them to me with a request to make it.  It didn't seem difficult (and I have made Shepherds Pie and Cottage Pie before, so I knew the basics), so this week, it was added to the meal planning.  I tweaked the recipe a little bit.  Rather than type out the original recipe and the changes I made, I'm just going to post my updated version.  The original recipe can be found here.

So, without any other rambling, on to the recipe.

Sweet Potato and Sausage Shepherd's Pie


Ingredients:


  • 2 Sweet Potatoes (I used large ones)
  • 1 Tbsp Olive Oil
  • 5-6 cloves of garlic, grated
  • 1 medium to large yellow onion, diced
  • 3 ribs celery, chopped
  • 3 carrots sliced (I used a handful of baby carrots)
  • 1/2 pound Italian sausage (I used 3 mild sausage links)
  • 1 pound ground beef
  • 1/2 teaspoon black pepper (I eyeballed fresh ground pepper)
  • 1 bottle stout or other dark beer (we had Guinness in the house, so I used that)
  • 1 cup or so frozen sweet peas
  • 1 1/2-2 Tbsp cornstarch
  • 3 Tbsp cool water
  • 1 - 8.25 ounce can creamed corn
  • 1 cup frozen corn (again, I eyeballed this)
  • 1/2 cup milk
  • 2 Tbsp butter/margarine
  • 1 Tbsp packed brown sugar

Directions:

Preheat oven to 400 degrees.  Spray/lightly oil your baking dish of choice and set aside.

Place chopped sweet potatoes in a pot and cover with water (covering potatoes by approximately 1").  Bring to a boil and cook for about 10 minutes, or until soft.


Meanwhile, in a large skillet, combine olive oil, onion, celery, and carrots over medium high heat.  Saute for about 4 minutes, then grate in garlic and continue sauteing another minute.  Add the ground beef and sausage.  Cook until meat has browned and is cooked through (about 8 minutes)

Add beer and peas.  Simmer until liquid has reduced by half (4-6 minutes or so).


In a small glass bowl, mix the cornstarch and the water to make a slurry.  Add this mixture to the skillet and stir until thickened (this should be a very quick thing).  Remove from heat and pour this mixture into the bottom of your baking dish of choice evenly.


Mix the can of creamed corn with the frozen corn and layer this evenly on top of the meat mixture and set aside while you finish up the sweet potatoes.

Once the sweet potatoes have cooked, drain them and return them to the pot.  Add the butter, brown sugar and half of the milk.  Mash this all together and add more milk as needed to make it as smooth as you'd like.  (I ended up using about a half cup of milk.)  Season with salt to taste.


Spread this evenly over the corn layer.

Bake for 35 minutes or until potatoes are lightly browned at the edges.


I put a sheet pan on the shelf directly below this to catch any overflow.  It turned out to be a smart thing to do.

Hubby and I really enjoyed this dish.  I think next time I'll leave out the creamed corn and just add the corn to the meat mixture.  Hubby doesn't like creamed corn anyway and I'm not sure it really added that much to the recipe.

I was a little concerned about the sauce flavor when I was making this.  All the other recipes I've used called for Worcestershire Sauce, but this just used the beer.  I'm not a beer drinker (my husband always tells me I don't like anything good), but the flavor in this sauce was really good.  It didn't need the Worcestershire Sauce in my opinion. 

Please try this and let me know how it comes out for you.

Thanks and Happy Eating!

Saturday, March 17, 2012

Linda's Herb and Spice World Tour Part 3: Ginger

I really do love this project that Linda and Lilly are doing.  I enjoy getting the spices and herbs and the new recipes that come with them.  I have already made one recipe that came in this month's packet twice and will be making the second recipe tomorrow.

Ginger


Zingiber officinale
syn: Amomum zingiber
Fam: Zingiberaceae


Ginger is native to India and China. It takes its name from the Sanskrit word stringa-vera, which means “with a body like a horn”, as in antlers. Ginger has been important in Chinese medicine for many centuries, and is mentioned in the writings of Confucius. It is also named in the Koran, the sacred book of the Moslems, indicating it was known in Arab countries as far back as 650 A.D. It was one of the earliest spice known in Western Europe, used since the ninth century. It became so popular in Europe that it was included in every table setting, like salt and pepper. A common article of medieval and Renaissance trade, it was one of the spices used against the plague. In English pubs and taverns in the nineteenth century, barkeepers put out small containers of ground ginger, for people to sprinkle into their beer — the origin of ginger ale. In order to ’gee up’ a lazy horse, it is the time honoured practice of Sussex farmers to apply a pinch of ginger to the animal’s backside..

Spice Description

Although often called “ginger root” it is actually a rhizome. It is available in various forms, the most common of which are as follows:

Whole raw roots are generally referred to as fresh ginger. A piece of the rhizome, called a ‘hand’. It has a pale yellow interior and a skin varying in colour from brown to off-white. Jamaican ginger, which is pale buff, is regarded as the best variety. African and Indian ginger is darker skinned and generally inferior, with the exception of Kenya ginger.

Whole fresh roots provide the freshest taste. The roots are collected and shipped when they are still immature, the outer skin is a light green colour. These can sometimes be found in Oriental markets.

Dried roots are sold either ‘black’ with the root skin left on, or ‘white’ with the skin peeled off. The dried root is available whole or sliced.

Powdered ginger is the buff-coloured ground spice made from dried root.

Preserved or ‘stem’ ginger is made from fresh young roots, peeled and sliced, then cooked in a heavy sugar syrup. The ginger pieces and syrup are canned together. They are soft and pulpy, but extremely hot and spicy.

Crystallized ginger is also cooked in sugar syrup, then air dried and rolled in sugar.

Pickled ginger has the root sliced paper-thin and pickled in a vinegar solution. This pickle is known in Japan as gari , which often accompanies sushi, and is served to refresh the palate between courses.

Bouquet: warm, sweet and pungent.
Flavour: Fiery and pungent
Heat Scale: 7

Preparation and Storage

In Asian cooking ginger is almost always used fresh, either minced, crushed or sliced. Fresh ginger can be kept for several weeks in the salad drawer of the refrigerator. Dried ginger should be ‘bruised’ by beating it to open the fibers, then infused in the cooking or making ginger beer and removed when the flavour is sufficient. Store dried and powdered ginger in airtight containers.

Culinary Uses

Fresh ginger is essential to Asian and oriental cookery. It is used in pickles, chutneys and curry pastes and the ground dried root is a constituent of many curry powders. Tender young ginger can be sliced and eaten as a salad. Sometimes the roots will produce green sprouts which can be finely chopped and added to a green salad. In the West, dried ginger is mainly used in cakes and biscuits, especially ginger snaps and gingerbread. Ginger is also used in puddings, jams, preserves and in some drinks like ginger beer, ginger wine and tea. Pickled ginger is a delicious accompaniment to satays and a colourful garnish to many Chinese dishes. Preserved ginger is eaten as a confection, chopped up for cakes and puddings, and is sometimes used as an ice cream ingredient.

Attributed Medicinal Properties

Ginger has long been ascribed aphrodisiac powers, taken either internally or externally. It is mentioned in the Karma Sutra, and in the Melanesian Islands of the South Pacific it is employed ‘to gain the affection of a woman’. Conversely, in the Philippines it is chewed to expel evil spirits. Ginger is a known diaphoretic, meaning it causes one to sweat. It was recorded that Henry VIII instructed the mayor of London to use ginger’s diaphoretic qualities as a plague medicine.

Ginger is most commonly known for its effectiveness as a digestive aid. By increasing the production of digestive fluids and saliva, Ginger helps relieve indigestion, gas pains, diarrhea and stomach cramping. The primary known constituents of Ginger Root include gingerols, zingibain, bisabolenel, oleoresins, starch, essential oil (zingiberene, zingiberole, camphene, cineol, borneol), mucilage, and protein. Ginger root is also used to treat nausea related to both motion sickness and morning sickness. Ginger has been found to be even more effective than Dramamine® in curbing motion sickness, without causing drowsiness. Ginger's anti-inflammatory properties help relieve pain and reduce inflammation associated with arthritis, rheumatism and muscle spasms. Ginger's therapeutic properties effectively stimulate circulation of the blood, removing toxins from the body, cleansing the bowels and kidneys, and nourishing the skin. Other uses for Ginger Root include the treatment of asthma, bronchitis and other respiratory problems by loosening and expelling phlegm from the lungs. Ginger Root may also be used to help break fevers by warming the body and increasing perspiration.

Ginger Nutella Brownies
(I have made these twice... and probably would have been a third time, but I'm out of cinnamon)

1 cup tub margarine, melted
1 1/2 cups sugar
4 eggs
1/2 tsp vanilla
1/4 tsp salt
1/4 cup cocoa powder
1/4 cup dark cocoa powder
2/3 cup unbleached all-purpose flour
2 tsp cinnamon
1 tsp ground ginger
2 tbls non fat plain yogurt
1/4 cup Nutella

Combine the melted butter, sugar, vanilla, and both cocoa powders.  Beat in the eggs.  Add in flour, cinnamon, ginger, and salt. Fold in the Nutella and yogurt.

Pour into greased 9x9 pan and bake at 350 for about 35-40 minutes, or until done.

Ginger Veggie Stir-Fry
(Making this tomorrow)

1 teaspoon cornstarch
1/4 cup orange juice
2 tablespoons soy sauce
1 medium carrot, julienned
1 cup fresh broccoli florets
1 cup fresh green beans (2-inch pieces)
2 tablespoons olive or vegetable oil
1 cup sweet potato, julienned
1 cup thinly sliced red onion
1 garlic clove, minced
1/2 teaspoon dried rosemary, crushed
1/4 teaspoon ground ginger
1/8 teaspoon crushed red pepper flakes

In a small bowl, combine cornstarch, orange juice and soy sauce until smooth; set aside. 
In a large skillet or wok, stir-fry carrot, broccoli and beans in oil for 8 minutes. Add sweet potato and onion; stir-fry until vegetables are crisp-tender.

Stir the soy sauce mixture; add to the skillet with garlic, rosemary, ginger, and pepper flakes if desired. Bring to a boil; cook and stir for 1 minute or until thickened. 

~*~*~*~*~*~*~*~

For the stir fry I will be swapping out green beans for snap peas (I seem to be having trouble finding fresh green beans at the produce store, and I think snap peas will work well).

I made one batch of the brownies for my husband and I.  He really liked them and they were having a bake sale for charity at his work, so he asked me to make them again for that.  There was only one left at the end of the day.  He said they were a hit at work.  

I could not find dark cocoa powder, so I just used regular for that.  I also used regular butter, and low fat vanilla yogurt (the only nonfat plain I could find was in quart sized tubs).  And to be honest, I liked them a little better when they weren't warm.  When they first came out of the oven I was exited to have the warm brownie.  I loved the spice in the batter, but when the brownie was fresh out of the oven and warm, the spice got a little lost.  It was more pronounced once the brownies were fully cooled (room temperature).  

I should also note that if you're expecting a texture similar to brownies out of a box, these will not give you that.  They were a little more on the cakey side.


Enjoy!


Friday, February 24, 2012

Cardamom Vanilla Pound Cake

Finally the finished product that I've been promising to post.  The Cardamom Vanilla Pound Cake that came along with part one of the spice project my friends Linda and Lilly are doing this year.  I have part two waiting to be posted, but I didn't want to do that until I got these pictures up.

So, back on January 6th, I posted the information and recipes for Cardamom in this journal.  I chose to make the pound cake recipe on that page.  It was delicious.  I think my husband said it was the best cake he's ever had, and he told me that we're never buying store bought whipped cream again.

You can go to the link above to find the recipe, so this blog is going to be mostly pictures and my own rambling about how it went.  There were a few things in this recipe that I had never done before.  I didn't even own a bundt pan, so I had to buy one of those, but I took advantage of my Amazon Prime free trial to order one with free 2 day shipping to get one.  I had also never used real vanilla beans before.

I started as the recipe directions stated.  I prepped the pan (even though the reviews of the pan I got said that you really didn't need to use anything on it), then mixed my dry ingredients together.


Then, in my mixer, I creamed the butter and sugar until it looked like this


Next was the vanilla bean scraping.  I cut the beans in half the long way and used the tip of my knife to scrape the pods.  I was surprised by two things.  The beans themselves were more waxy feeling than I thought they'd be, and there were more seeds in them than I thought there would be.  I wasn't complaining though.


I still have the shells.  They are sitting in a container with white sugar to make vanilla sugar.  I use it in other dessert type things.

I continued to follow the directions.  A friend of mine gave me some lemons for the lemon juice.  Before I cut and juiced the lemon, I zested it to sprinkle on top of the whipped cream.  You'll see that later.

Once everything was mixed together (eggs, lemon juice, flour mixture and milk), it should look like this (you can see all the little dots of the vanilla bean seeds in there):


Then it gets spooned into the bundt pan carefully.  You don't want to undo all the butter and flour prep that you did in the beginning.  I got it all in there (and I was very proud of myself for not getting too much on the sides), tapped it on the counter like the directions stated and smoothed the top with my spatula.


I let it bake as directed.  It took about an hour like the recipe suggested.  It looked pretty even still in the pan


Next came the scary part.  Bundt pans are notorious for not releasing completely and you end up with chunks missing out of your pretty cake top.  After what had been about an hour cooling in the pan, I decided to give it a shot.  I put my cooling rack on top, flipped it over, and tapped on the pan a few times.  I closed my eyes and pulled the pan up.  When I opened my eyes I was amazed.  It came out beautifully.


My husband came home, looked at it and asked if it was a real cake.  It came out so well that it was shiny (as you can see).

Some time during the baking/cooling process, I made the whipped cream.  It was a pretty simple process.  You added everything together in the mixer:


And mixed it until it was fluffy and held it's shape.  I probably could have beat it for a little while longer, but if you mix it too long, it starts to turn to butter (which I did at a later date on purpose).


And the final served product:


Try it, it's good ... mmm.

Thanks and happy, yummy eating.

Thursday, February 23, 2012

Mmmm... Bread Part 2 ...

So, I make bread frequently because it's cheaper than buying bread.  It's not really all that difficult now that I've found a recipe that gives me a softer crust.  Crusty bread is good for some things (like dipping in olive oil and balsamic vinegar ... yum), but for an every day bread that I use for sandwiches and stuff, I like something that doesn't feel like I'm tearing up my mouth if I bite into it.

One of the first posts that I did was of my favorite bread recipe, and you can find that here. The only "problem" with this bread is that it's made with white flour.  I put problem in quotes because it's not really a problem.  I'm sure it's healthier than white bread you can get at stores, but it could also be healthier.

A while back, I tried to make some homemade granola and it came out okay, but it wasn't exactly the texture that I was looking for.  I wanted some granola that clumped together.  To try to accomplish that, I had purchased some wheat germ.

My hope was that the smaller particles would kind of act like a cement when the liquid/sugar flavors were added and create the clumps I was hoping for.  It didn't, but this blog entry isn't about granola.  This part is just back up to explain why I had some wheat germ just hanging around with my baking stuff.

According to some information I researched, I could substitute up to 1/3 of my flour in yeast breads with wheat germ.  So, that's what I did in my bread recipe.  I was looking for something to make my bread a little more nutritious.

I followed the same process as in the main recipe and used 1.5 cups of wheat germ and 3.5 cups of flour.  In the bread recipe, the ratios of wet to dry liquids work out perfectly every time, but with the substitution, the dough was very wet and sticky.  I added more flour, a little at a time, until the dough started to pull together.  I think it was 3/4-1 cup of additional flour.  The dough was still a little softer and stickier than I was used to, but it was just dry enough that it wasn't sticking to everything anymore and I didn't want to over work the dough or make it too dry.

I continued to follow the same process outlined in the main recipe and let the dough rise.  I punched it down, split it in two, rolled the loaves and let them rise again.  I baked them at 400 degrees for about 20 minutes (rotating the pans once on the shelf for even browning about 10 minutes in), then took them out to cool.


Once they were mostly cooled, I sliced them in to small, sandwich sized slices and tried a piece.  It turned out pretty good.  To be honest, I wasn't sure how it would taste because I love the taste of the other bread, but I think this one might be even better (though I haven't tried it with a little peanut butter and a little Nutella yet... one of my favorite dessert sandwiches).  It even got a "pretty good" out of my husband, who has never really been a fan of the wheat breads I've bought in the past.  He said that he thought it came out softer than the other version.


I'm getting pretty good at slicing even slices in bread.  I used to be horrible at it.  I guess practice really does help.  A good knife doesn't hurt either.

This is the first time I've really done a substitution in a baking recipe.  I've always been a little afraid to do that because baking can be pretty fickle, and it can turn disastrous if you get the ratios wrong (though breads tend to be a little more forgiving I think).

Anyway.  Give it a try if you want and let me know what you think.

Thanks and happy eating (happy and healthier)!

Tuesday, January 31, 2012

Rum Raisin Rice Pudding (a.k.a. Alcoholic Dessert ... Mmmm)

So, I know I said I was going to post the other cake when I did my last post, but I lied.  It wasn't really an intentional lie.  I had planned that it would be my next post.  But I've had a request for a recipe, and the Vanilla Cardamom Pound Cake pictures are still on my fancy pants camera, so those two things combined are the reason that I lied.

Tonight's dinner was Lasagna Cupcakes followed by Rum Raisin Rice Pudding.  I was posting pictures on Facebook during the process and caught some peoples' attention.  One friend commented that they looked good and a change in menu was now in the works.  Another friend added me to a Facebook group called "What's For Dinner."  That's where the recipe request came from and since I was planning on posting it anyway, and my husband is currently asleep on the couch, now was as good a time as any.  So, onward!

Rice pudding is amazingly simple and easy.  I've made it twice in the last few weeks.  I've combined a few ideas from different recipes around the internet, and adapted my own kitchen supplies into this.  The first time I made it, I let the raisins soak for a few hours.  The most recent time, I let them soak for 2 days.  I think my husband would prefer a soak time somewhere in between the two, but they both tasted pretty good to me.


Rough Ingredients:

1 cup of raisins
approx 1/4 cup of dark rum (I used a black spiced rum, and you'll need a little more if you plan on soaking longer)
1 cup white rice (I use Jasmine, though Arborio rice is supposed to work really well)
4 cups of milk/cream mixture (I use powdered non-fat milk in my cooking, so I did 3 cups non-fat, 1/2 cup whipping cream, 1/2 cup almond milk)
1 cup water
1/2 tsp salt
1/2 cup sugar
1 cinnamon stick (or sprinkle in some ground cinnamon ... sometimes I do both)
1 1/2 tsp vanilla extract (or just a splash, because I don't measure this part)
1 egg, beaten

The first step is to get the raisins soaking in the rum for as long as you want. 

When you're ready to make the pudding, measure out your liquids and combine them with the salt and sugar in a decent sized pot, about 2 qt minimum.  Heat to just below boiling and stir in the rice.  Bring back to a slight bubble, then reduce the heat to low.  Cook uncovered for 30-45 minutes until rice is soft, stirring frequently.

In a bowl, mix some of the hot rice liquid into the beaten egg to temper the egg, then add the warmed egg mixture back into the rice pudding, stirring to mix thoroughly (If you don't temper the egg, you end up with bits of cooked egg in the pudding... It doesn't affect the taste at all though, so if you're like me and you do this, don't worry about it).  Cook for about a minute, then remove from heat.

Add the vanilla and the raisins (with any remaining rum if desired) and stir well.  At this point you can serve it warm, or you can chill it to serve cold.  If you serve it cold, place a piece of plastic wrap directly on top of the pudding to prevent a skin from forming.

I usually split this into individual serving sizes before refrigeration.

Yum yum... Enjoy and happy eating!

Sunday, January 8, 2012

Mmmm... Bread


Today my husband asked me if I was planning to make bread all the time now (rather than buying loaves).  I said I probably would and asked why he was asking.  "Because this is really good bread," he responded while taking a bite of toast.

On Friday I made two loaves of my favorite bread recipe.  It's actually a recipe for hamburger buns that I just decided to make loaves out of.  One of my biggest complaints about bread recipes is the crusty crust.  I like that in Italian breads, but for an everyday sandwich bread, I was looking for something a little softer.  I have seen all sorts of tips for making bread crustier, but I never seemed to find anything to make a crust softer.  This recipe is just soft enough and makes 12 rolls or two loaves of bread.

Ingredients:

  • 1 cup milk
  • 1 cup water
  • 2 tablespoons butter or margarine
  • 1 tablespoon white sugar
  • 1 1/2 teaspoons salt
  • 5 1/2 cups all-purpose flour
  • 1 (.25ounce) envelope active dry yeast
  • 1 egg yolk
  • 1 tablespoon water

Directions:


  1. Combine the milk, 1 cup of water, butter, sugar and salt in a saucepan.  Bring to a boil then remove from the heat and let stand until lukewarm.  If the mixture is too hot, it will kill the yeast.


  2. In a large bowl, stir together the flour and yeast.  Pour in wet ingredients and stir until the dough starts to pull together.  If you have a stand mixer, use the dough hook to mix for about 8 minutes. If not, knead the dough on a floured surface for about 10 minutes.  Place dough in a greased bowl, turning to coat.  Cover and let stand until doubled in size, about 1 hour.


  3. Punch down the dough and divide into 12 portions.  They should be a little larger than a golf ball.  Make tight balls out of the dough by pulling the dough tightly around and pinching it at the bottom.  Place on a baking sheet lined with parchment paper or aluminum foil..  After the rolls sit for a minute and relax, flatten each ball with the palm of your hand until it is 3 to 4 inches wide.  You may want to oil your hand first.  Set rolls aside until they double in size, about twenty minutes. (For loaves, divide dough into two, stretch into a rectangle and roll .  Pinch the sides and the bottom seam.  Place into loaf pan seam side down.  Cover and let sit until the right size.)

  4. Preheat oven to 400 degrees F (200 degrees C).  Mix together the egg yolk and 1 tablespoon of water in a cup or small bowl.  Brush onto the tops of the rolls.  Position 2 oven racks so they are not too close to the top or the bottom of the oven.  (I don't use the egg wash on the loaves.)
  5. Bake for 10 minutes in the preheated oven.  Remove the rolls from the oven and return them to different shelves so each one spends a little time on the top.  Continue to bake for another 5 to 10 minutes, or until nicely browned on the top and bottom. (For the loaves, I use a similar time table.  Instead of switching racks, I just swap sides of the rack.  I bake them until they smell done and are hollow sounding when you tap the top.)

These are really good rolls and make a really nice loaf of bread.  The bread makes excellent grilled sandwiches too.  My next bread adventure should be to try to find a nutty bread to make... or a rye bread for my husband.

Thanks and Happy Eating!